When it comes down to it, I’m a Yankee. If I can save something that won’t occupy much space and I think I’ll need in the future, you can bet its packed away somewhere. If I can build something rather than buy it, I’ll gladly buy the books/plans/tools required if it means I can make it to my specifications, maybe save some money and get new tools out of the deal. I like to bring that DIY attitude to any of my hobbies, fly fishing included. Fly fishing is a gear heavy sport, and almost none of it is cheap. Even the little odds and ends add up quickly. So when I started getting a few spools of tippet material I realized that I was going to need a holder of some sort. A brief google search brings up a myriad of choices, from the beautiful aluminum example by Fishpond to the simpler design that I would soon use as my template.


The Fishpond is sexy, no doubt about it. But at $20, it’s both a pricey, and over-engineered way to hold some spools. I looked at the simple design of the spool holder on the right, then at the price tag at Orvis. Immediately I thought: “phh…I can make that for free.”And, in the spirit of DIY, I thought I would share a little tutorial on how I made mine. I have gone through a couple revisions, and its not out of the question that it gets revised again, but I’m happy with the current model for now. I have a hodgepodge of tippet spools on it now. I think over the course of this season I’ll attempt to homogenize them a bit. For now though, they work fine.
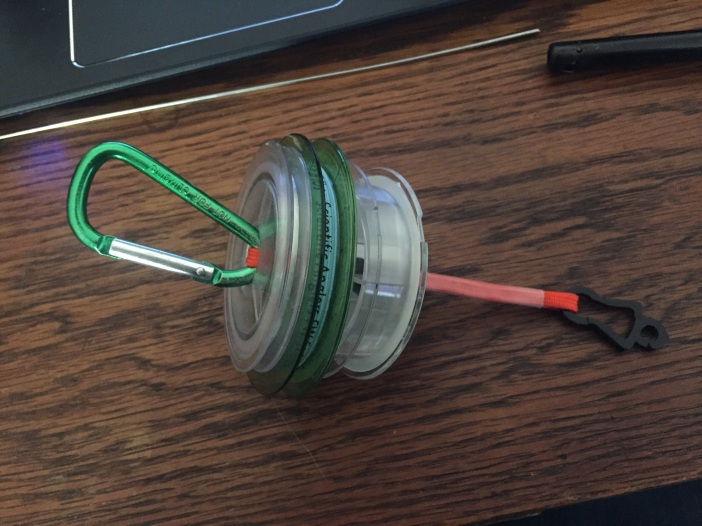
Pretty sexy huh? I realize now that my photo isn’t the best since you can’t see the key component behind the spools. There is a drawstring button there to provide tension and keep the spools from sliding around, just like on the Orvis model. There isn’t much to it, I’ll lay out the materials below:
- Approx 8″ paracord
- 1 Small Carabiner (the one I’m using is about 1″ (at its widest) x 1.5″ tall
- 1 small black clip (optional, it could even be another caribiner if you wanted)
- 1 piece of heat-shrink tube ( just larger than the paracord, I think I used 3/16″)
- 1 drawstring button
Other stuff:
- Knife or Shears
- needle-nose pliers
- superglue
- lighter

First you want to cut your length of paracord. I really didn’t measure this at any point. I just doubled up the cord and eye-balled how long I thought it should be. I turns out that I made my holder almost exactly 4″ long and I think that is a pretty good length, especially if you have a lot of tippet material. So to get 4″ of overall length while doubled up, you need 8″ total cord. Don’t burn the ends to keep them from fraying. You can see one end burned in the above photo, I actually cut this off and I’ll explain why in the coming steps.

Next you want to pull the inner portion of the paracord out. I’ll be honest here, the very first version I made of this, I did not remove the inner part and I like the diameter of the final product. What made me go back and remove the inside, is that my drawstring button isn’t big enough. So if you can, I might suggest experimenting a bit and see what works best for you.

Now that the innards have been removed, we can join our cord together. I did not want any sort of external knot that might impede the loading of spools and over all I think it looks much cleaner this way. Finding the approximate center of the cord, I double over one side and bring the end to the center. With a couple dabs of super glue to hold it, we can move to the other side and do the same thing. This step is why I recommend not burning the ends. the soft ends are allowed to compress and the final product wont have a lump in the middle.

It should look like this now, with the seam approximately in the center and each end formed into an open loop. The less super glue used, and the cleaner its application the better. I think even here I used a little too much but it doesn’t bother me enough to go back and change it. I also kept any twisting of the cord to a minimum. It lays nice and flat.
Now you can trim the heat-shrink tube to length. Leaving enough clearance for the loops on each end. (I really recommend finding long tube that you cut rather than using two smaller tubes. The seam that is created in the middle doesn’t play well with the drawstring button.)

You can see in the above picture I’m using a piece of braided line to pull the cord into the tube. This was a tight fit but it wasn’t much trouble to pull through. I would recommend keeping the diameter of the heat-shrink tube as small as possible to keep an overall cleaner look at the end. It won’t be the end of the world if you have to grab a bigger piece though.

Here it is. The cord has been pulled through, but the tube has not been shrunk yet. I think it looks pretty good at this point but let’s go ahead and shrink it up. It’ll provide some stiffness and lock everything together. If you are not familiar with shrink tube, you can buy a box of it from Harbor Freight for a couple of dollars. If you are a hobbyist it will last you for years. All you have to do, is lightly run the lighter under it. You can also use a heat gun if you have one. As you run the lighter under it, keep the flame moving and rotate the cord. I like to start in the middle and work my way toward the ends.

It should now look something like this. You can see the spots inside, where I used the superglue. Like I said before, the cleaner the application of the glue, and the less you use, the better your final product will be. Also, if you use a colored shrink tube, it’ll hide some of this better. But that’s it. The only thing left to do attach the clips and slide on the button.

Here is the finished product. It seems to be working well so far. I took it on the Peters Pond outing from my previous post and while I didn’t need any additional tippet; I never noticed it dangling from my pack. I think that is the biggest testament. The last thing I want to is to feel this thing banging around while I’m walking or casting.
Some final thoughts:
- As previous stated, this is the third revision, mainly because I found the long piece of shrink tube. My last version was identical except that I had used two short pieces and joined them in the middle. It seems like a small difference, but the button constantly got caught at the seam when I slid it up or down. It’s much smoother now with a single piece.
- Early on I noted that I liked the final diameter of the holder when I left the inner cord intact. Unfortunately the only draw string button I have, won’t fit around it. So I’m going to keep my eye out for one that looks bigger. If I can find one, I’ll probably make a fourth version.
- This was a ridiculously easy DIY project that probably didn’t warrant so many pictures or such a detailed explanation. But this was as much a practice for me to write a tutorial as it was an actual tutorial. Hope it helps.
Tight Lines

As you said, many of the tippet holders today are silly expensive. I plan to do something similar using your design as a guide. Thanks for sharing!
LikeLiked by 1 person
Just read about your DIY tippet holder and am impressed with your ingenuity. I would like to know if there is a technical name for for the small black clip at the top or, better yet, where you found them to buy. Thanks in advance for your help.
LikeLiked by 1 person
Hey Richard I’m terribly sorry for this super late response. I never noticed the comment on the post. I actually don’t have a great resource for that clip. They come on these generic nippers I buy at The Bears Den in Taunton, MA. I’ve never seen them anywhere else. I’m sorry I don’t have more info on them but any mini carabiner or clip would work just as well I think.
LikeLike
Very nice tippet holder and the price is awesome. Thanks for sharing your idea.
LikeLike
Loved this DIY workaround for the pricey spool holders, Thanks! I plan to use this but also some grey pipe insulation to make 2-fly rigs to fit this tippet spool holder, I might use empty tippet spools for that, saves a ton of time on the water. Right now Im using a plastic Kraft Parmesan Cheese container with lid to store the pipe insulation section with my 6-8 2 fly rigs. Its not small enough for a fly vest so I will keep in a sling pack, but gets the job done!
LikeLiked by 1 person